Thursday, September 29, 2011

Big Girl Room Pinspiration

As much as I don't want to face it, my baby is turning into a big girl. She even tells me so, "Big Gull" and, "Myself" is a fav of hers. I started thinking about a "big girl" room a few months ago and began pinning. Her room right now is cute with a green, pink, and black color scheme and subtle (ok, maybe not so subtle) "pug" theme. The pugs will always stay in some form or another, but the colors need to change. The walls are green and her furniture is black, and some of it will need to be painted.

I'm leaning toward a pink and blue color scheme and have found LOADS of inspiration via Pinterest. Here is some of my favorite Pinspiration!

A possible color palette. I love the varying shades of pink with some blue and green.

via


Love the blue and white polka dot wall and soft pink curtains. Those pillow shams are pretty awesome too!

via


This room is just precious in every way. Love the shades, daybed, pillows and wall color.


via


I think E's dresser needs a coat of pink paint!

via


Of course I heart this dog fabric!

via

These pink and white striped curtains are adorable!

via

I would love to incorporate a loft bed into her room, but that's not going to happen in this house. There is absolutely nowhere in her room for one! Hopefully our next house will have the perfect wall for a loft bed. E also needs to be a bit older...I can picture her trying to "fly" off the bed at this point in her life.

via


This room has the perfect little alcove for a loft bed! I love that the bed is not taking up any floor space, so you don't lose any play space! It's the perfect spot for a play kitchen.

via


I have no idea when this big girl room will start to take shape. Right now, it's just all in my head. And, thank goodness for Pinterest, since my head is not the place to be storing things! Isn't Pinterest the greatest!

Linking to:
5 Minutes Just For Me  

Monday, September 26, 2011

Fall "Mantel"


We don't have a fireplace in our house, so therefore, we do not have a mantel. I miss having a mantel to decorate with the seasons and holidays. After seeing all the amazing mantels on Pinterest, I decided it was time to remedy my mantel-less situation.

Since adding a fireplace to our house was not going to happen, I decided to make a "mantel". I had seen Shelley's kitchen shelves tutorial here,

and knew that I could make some too. So, off to Home Depot I went. I decided I wanted my shelves 3 feet and 4 feet long, so I purchased an 8 foot long 1x6 ($7.22) and had the guy at Home Depot cut it for me. I had found some brackets that I really wanted to use, but they were $6.85 each, and I needed four. I found some cheaper brackets that were not as pretty but would do the job for $1.98. Problem was, there was only two of them. Here's where it pays to chat up the associates at your favorite stores. I told the guy cutting my board that I had found two brackets but needed four and that there were other brackets I loved but were too expensive. What did he do? He gave the prettier, more expensive brackets to me for the cost of the cheap ones! SCORE! I got four, really pretty, more substantial wooden brackets for $7.92! He told me it was their fault they didn't have what I needed, and you should always ask for an upgrade when that happens. I think I thanked him about 100 times.

Below is one of the beautiful brackets!


Ben and I actually worked together on this project. Those that know us, know we do not work well together. We almost killed each other once on a canoeing trip because we both are crazy stubborn, and I like to be in charge. Big surprise. We will never go canoeing again.
Ben helped me cut the trim for the shelves with the miter box (still don't have that 12 inch miter saw with a laser). I actually only got frustrated once during the whole process! After all that cutting, we both decided that the shelves looked better without the trim. If I change my mind, I've got it already cut and ready to go...

Here is my priming station all set up under the carport one night. Yes, those are diaper boxes. I used spray primer for the first coat, and then gave the wood a good, fine sanding. But for the actual paint I used, wait for it........regular paint and a real paint brush and roller! Shocker, I know.


I used Glidden Antique White in semi gloss because this color will be showing up on my kitchen cabinets in the very near future. I added some Floetrol to my paint after reading Centsational Girl's praises of the stuff. It's supposed to minimize brush strokes in latex paint, and let me tell ya, it does! I am now in love with Floetrol. There is not a brush stroke to be found on my shelves. It makes me want to paint my kitchen cabinets yesterday.


Here's my painting set up on Sunday. I had to position myself in the garage so I could see the "man room" TV since the Titans were playing.


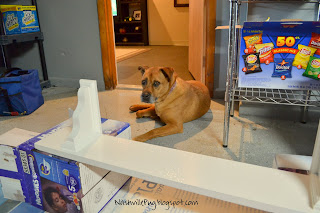
Hoover was my painting companion this time. Had to give the mutt some blog time too.


And here are my new shelves, all ready for fall decor, hung in the dining area of our kitchen!


Now I have not one, but TWO "mantels"! I am in love with my new shelves. In total, they cost just $16 to make!


I added some pumpkins and gourds that came from Michael's and Wal-Mart. The little urns had silk flowers in them and were on clearance. I knew I could pluck the flowers right out and use the urns for something else.

The wreath was a $2.50 Michael's find. The "M" I already had.


Love this little wire basket I found at PD's in Franklin.


The tray was a hostess gift and has leaves and acorns on it. I found a great place to display my WUSLU bottles and caddy!


One last look...I love it!


I'll be linking up  to the Fall Mantels party at The Lettered Cottage!
The Lettered Cottage

And here as well:
Visit thecsiproject.com  Todays Creative Blog Domestically Speaking   Weekend Bloggy Reading The DIY Show Off Remodelaholic    The DIY Show Off  mY Uncommon Slice of Suburbia 

Posted by Picasa

Sunday, September 25, 2011

Painted Planters and a Fall-ish Front Porch


I have been looking for urns like these below for our front porch for a long time now. I wanted the lightweight urns that look like concrete. Everywhere I looked had them for at least $40 each! That was way more than I wanted to spend on front porch decor, even if they would last me a long time. That kind of money is just not in the budget right now.


Enter these cream, plastic urns.

I look at the planter section every time I'm in Home Depot or Lowes (or anywhere that has planters) hoping that they will have my dream urns on clearance. I walked right past these urns in Lowes because they were turned upside down and not put together like the one on the right. The urn base caught my eye, so I went back to take a closer look. I knew right away that I could spray the urns black and have them look much more "Ballard". So, at $12 each, I grabbed two!

Here's my partner in crime again...black spray paint made specifically for plastic.


I had to get a shot of the sign that hangs over my husband's work bench. It says "fishermen, hunters, and other liars...Gather Here!" It cracks me up! I'm actually the one that "gathers" there the most!


In process


All sprayed and looking festive with some pumpkins!


I took the middle size pumpkin and stuck some round stickers on it, and sprayed it black to break up all the orange. I love the polka dots! Also, the pumpkins were having a little trouble standing up straight, so I  drilled some holes into the tops and bottoms and inserted a wooden dowel...everyone has wooden dowels lying around their house, right? I live on a busy street, and I know I got some funny looks from drivers by as I took a drill to my pumpkins right there on the front porch!


The urns and pumpkins were missing something...a little hay! Looks much better and more festive. You can't have a fall porch without a little hay!


Looking much more fall-ish around here! The pumpkins go quite nicely with my fall wreath and Goodwill monogrammed pumpkin!


I think those holly shrubs need a little trim so you can see the urns a little better!


These $12 urns make me so happy!


On a side note, yesterday a neighbor down the street stopped by while I was outside to tell me that she loved my urns and pumpkins! She made my day! She said she loves to drive by our house to see what I'm doing to the front porch. She said she noticed I had moved my ferns from the front porch and told her husband she couldn't wait to see what I was doing next! So sweet!

Linking to these fabulous parties:
Between Naps On The Porch  Domestically Speaking Weekend Bloggy Reading

  36th Avenue

 Home Stories A to Z The DIY Show Off  Todays Creative Blog   Visit thecsiproject.com Photobucket One Artsy Mama mY Uncommon Slice of Suburbia

Posted by Picasa