Wednesday, December 28, 2011

Stenciled Burlap Pillow Covers

Did I tell you that I went to Atlanta a couple of weekends ago on a girls' trip? Well, I did, and it was SO.MUCH.FUN! 


Su, Me, Lu, and Heather. We are missing our other two peeps, Claire and Kristen, who didn’t get to make the trip this year.


At least once a year, my girlfriends from childhood (we went to school together for 12+ years!) get together for some kind of weekend trip. This year we chose Atlanta for the relatively short drive and shopping. We went shopping, ate, slept, and went shopping! Stops during the weekend were an outlet in Dawsonville, GA, IKEA (I was a first timer and fell in love), Lenox Mall, Crate & Barrel, and not one, but TWO Ballard Designs outlets! I had no idea there was even one Ballard outlet, so when we found out there were two, we had to check them out.


One of my finds at the Ballard Outlet were $5 burlap pillow covers! I scooped up several knowing exactly what I wanted to do with them. I've been dying to stencil something, and I finally found my project!


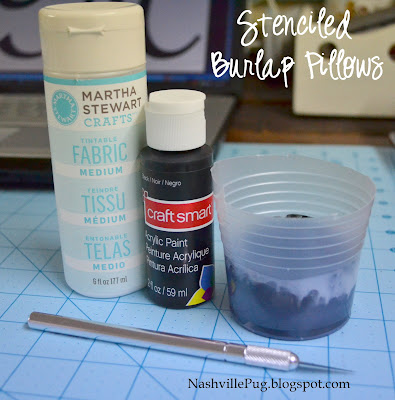
For this stenciling project, I used freezer paper. For those of you not familiar with freezer paper stenciling, check out this tutorial. It is so easy!! I’ve been wanting some personalized pillows for our front porch with our monogram and house number, so that’s what I decided to do. I found a font in Word I liked, enlarged the letters and numbers to fit the scale of the pillows, printed them out, and then used my exacto knife to cut the stencil out on the freezer paper. An exacto knife is really key to cutting out the stencil since you want really precise cuts so the paint won’t leak under the paper.


To make my paint fabric-ready, I added some fabric medium to it. You can also buy paint made specifically for fabric, but I didn’t have any of that kind of paint.

Here is my stencil all cut out and ironed onto my fabric. The shiny side of the freezer paper goes against the fabric, and once ironed, adheres to the fabric until you peel it off. So cool!


Before you begin to paint, make sure you place something under the fabric so the paint does not bleed onto the other side. I used aluminum foil for some strange reason, but it worked really well. I used a sponge brush to paint the fabric so I could help push the paint into the rough burlap. I just dabbed a generous amount of paint all over the fabric to make sure it was well covered.


Here’s what your stencil will look like once it’s been painted. You should not have to worry about it bleeding around your stencil if it’s been ironed on well. You’re supposed to leave the paper on the fabric until it is dry, but this impatient stenciler pulled it off after only about 15 minutes! I couldn’t wait, and it turned out fine! I guess you could have a problem if you ended up needing another coat of paint…


The house number pillow is my favorite! I think it will add such a personal touch to our front porch. The layout of your numbers will depend on how many you have. I made one for my Mom as well using three numbers placed diagonally from the top left corner to the bottom right corner.


Don’t forget to save any small pieces of paper that go inside letters and numbers like the ones for the “8”. Let your paint dry a few minutes hours, then peel off your paper!

Let me tell you, it was so much fun peeling off that freezer paper and seeing perfectly stenciled letters and numbers! I now see why so many bloggers say freezer paper stenciling is addictive!

Here's a completed pillow looking pretty on our front porch!


A little side by side comparison.


Have you stenciled with freezer paper? I hope I've inspired you to give it a try!

Photobucket

Linking up to some of these fabulous parties! Tatertots & JelloBetween Naps on the PorchMy Uncommon Slice of SuburbiaSerenity NowMommy By Day Crafter By NightThe 36th AvenueThe DIY ShowoffToday’s Creative BlogAt the Picket FenceHome Stories A to ZGingerbreadRemodelaholicThrifty Décor ChickThe CSI ProjectBeneath my HeartCrafty Scrappy Happy, Perfectly ImperfectOne Artsy Mama

Monday, December 26, 2011

Christmas Wrap-Up in Pictures

Here’s a final Christmas post to wrap it all up. We had loads of fun and were blessed to be surrounded by family! I’m going to let the pictures speak for themselves (for the most part)…
image

E and my niece, Leah, on Christmas Eve.
image

My “Nanny” and all nine of her grandchildren and spouses and great-grand girls. Adding two more great-grand girls next year!


Santa made it to our house!
image
image
image
image

A Christmas explosion!
image

Christmas night at my parents’ house
image

This one was too funny not to share!
image
I hope everyone had a very Merry Christmas! Our decorations are all packed away and we are ready for New Year’s! We don’t usually do much to celebrate New Year’s because Ben and I both think it’s highly overrated, but my bestie and her husband are flying in from Houston, so we’re headed to the Music City Bowl on Friday and then a nice dinner and fun party are in order for Saturday!


Photobucket

Wednesday, December 21, 2011

Oh What Fun!

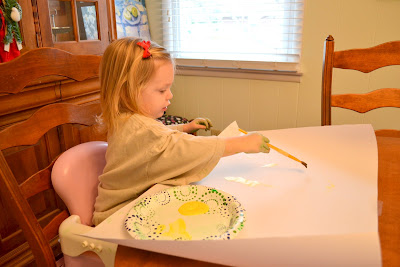
Elliotte and I had a little messy fun the other day! I broke out the washable paints and let E do her thing. She loves to paint at school, so I knew she would love to paint at home too. Every Tuesday and Thursday when I pick her up from school and ask what she did that day, she says "PAINT!" with tons of enthusiasm.

So that's what I let her do...we started with green.


I had envisioned a "hand print" Christmas tree, but E had other ideas...and that was fine.


Then we moved to yellow.


And finished with a little red.


When she started to paint herself, that's when I called it quits!


Luckily a dip in the tub took it all away.


What are some activities you do with your kids to beat the winter blues?
Christmas is just a few days away!! Are you ready?


Photobucket

Monday, December 19, 2011

Merry Christmas from NashvillePug!


We wish you a Merry Christmas
and a Happy New Year!
Xmas Card edited

I hope everyone is enjoying this Christmas season! I have been taking it a little slower lately and just hanging out with my family. I've been cooking a little more and just sitting back and relaxing at night. It feels so nice! We get 2 1/2 weeks off school this break, and instead of doing projects like a mad woman, I'm going to spend most of it hanging out with my girl who's out of school too! We're having so much fun right now building forts on the couch, reading, and just playing. I hope everyone gets to take some time out this season and enjoy your family!


Photobucket

Monday, December 12, 2011

Semi-Homemade Teacher Gifts {Spiced Tea Recipe}

Every year I struggle a little to think of what to get for all of Elliotte's teachers. This year, she has two fabulous school teachers and four amazing church teachers. I really enjoy giving something homemade, instead of just going to a store and buying something or giving a gift card. All these teachers put forth so much love and effort in teaching my child that I want to put forth some effort in their Christmas gift. We don’t have much money to spend on gifts, so I got to thinking.

I found these adorable mugs at Southeastern Salvage here in Nashville, and I immediately knew that I wanted to give them as teacher gifts. They came in a pack of four mugs, so I bought two boxes.

For the homemade part of the gift, I decided to make a spiced tea mix. I don’t like tea, but I LOVE this mix! Here’s the recipe I used:
1 jar Tang
2/3 cup decaf instant tea
1 1/2 cups powdered lemonade mix
2 cups Splenda
2 tsp. ground cinnamon
2 tsp. ground nutmeg
Add more of less of each ingredient according to your taste.

Mix it all together and then add 2T to a mug of hot water!

For the gifts, I divided the mix into 1 cup portions, and then poured it into Ziplock baggies. The one cup portions should yield about 12 mugs of spiced tea! I was able to get all six teacher gifts out of this one recipe.

I wrapped the baggies in green tissue paper and then stuffed them into the mugs. Attach a printable gift tag with the mixing instructions, and you’re done!

I hope E’s teachers enjoy sipping their spiced tea while relaxing in front of their Christmas trees! At least that’s what I picture them doing!
What do you give for teacher's gifts? Give me some ideas for next year!


Photobucket

Thursday, December 8, 2011

Let there be light!

Our garage is not pretty. It’s a garage, so it really shouldn’t be. You’ve probably seen our garage in the background of DIY posts/pictures like this one from my project table:
image
One of the first things you probably notice (other than the mess) is that it’s very dark. This photo has actually been adjusted for light, so it really was darker than what the photo suggests. The one and only light in the garage is in the foreground of the picture over the work bench. See that area back by the garage door and boxes? That’s where I do all my DIY projects. I used to lift the garage door up and down multiple times while working on a project so the light from the opener would stay on!
I’ve been asking for more light in our garage for a very long time now. Well, we finally got it done!! Last week while Ben was on a hunting trip out of town, I asked my Dad to come over and help me install some additional lighting. While not very exciting, it was very much needed. We he installed two more 4 foot shop lights, and the difference is night and day (pun intended)! It also helps that the garage is now much cleaner and less cluttered. Once I had some light, I got to cleaning like a mad woman. It was literally so dark in our garage that I had to use a flashlight to see which paint I needed.
DSC_0001
Isn’t it as beautiful as a garage can be? No light adjustment in these photos!
DSC_0003
Every time I turn on the light in the garage now, I’m surprised by all the light! I don’t know how long it will take to get used to it, but I sure am happy!
miter saw
Well, I’ll tell you!!  It’s my new 12 inch sliding miter saw from Harbor Freight! It was a much anticipated birthday gift from my parents. Now that the garage is cleaned out and lit up like it’s Christmas, I can start using it! I’m quite excited to start looking for my next DIY project that will require a miter saw! Crown molding anyone?