Showing posts with label sewing. Show all posts

Monday, January 30, 2012

Burp Cloth Tutorial: How to Make a Pretty Baby Gift

Guess who didn’t have the Internet at home last week? ME! While it was highly frustrating because I teach two online classes, it was kind of nice knowing that I couldn’t get on the computer. I’ve got a log of blog reading to do!


image

I’ve got an easy tutorial for everyone today. If you know how to sew a straight stitch, then you can make pretty burp cloths to give as gifts. Burp cloths are my go-to gifts for new moms because I firmly believe you can’t have too many! Ever since the day Elliotte went through every single burp cloth we owned plus some towels, I’ve given them as gifts. I used to order them through Etsy until I learned to sew and realized how easy they were to make.


All you need is a pack of cloth diapers and some coordinating fabric and thread. I like to use fat quarters from JoAnn because I can make three burp cloths with each one. These burp cloths are obviously for a precious baby girl.
image

Start by unfolding one of the burp cloths and measure the length and width of the center strip. Then, using a cereal box or something similar, cut out a strip equal to the center strip of the burp cloth. This will make things so much easier!
image

Using the cut-out as your guide, cut your fabric a little bigger than the strip. A rotary cutter makes things go super fast! I usually go ahead and cut all my fabric at the same time.
image

Now move to your ironing board, and iron your fabric around the cut-out. I also iron the burp cloths at this point too.
image

For the ends, I fold them over just like I’m wrapping the ends of a present.
image

Once the fabric is ironed all around, pull the cut-out from inside the fabric. Now you’re almost ready to sew!
image

Place the ironed fabric right side up on the burp cloth and pin it down in a few places.
Note to self: get a new ironing board cover! Gross!
image

Now it’s time to whip out your sewing machine! All you have to do is sew a straight stitch around all four sides of the fabric. Make sure you back stitch at the beginning and once you get all the way around the fabric. It’s “sew” easy! Yep, I typed that.
image

Once you’ve done all this three times, you’ve got a super cute and sweet homemade gift for a new mom and baby! If you want to get fancy schmancy, use a zig zag stitch or add some ric rack around the edges. I used a zig zag stitch on the bottom burp cloth below, and it adds a little extra touch.
image

Wrap the burp cloths up with a pretty ribbon and you’re all done! I love picking out fabric for these gifts and making them look pretty. I like to make them pretty for boys too.
image

Now you know how to make an easy baby gift that a new mom (and dad too) will use all the time! What’s your go-to baby gift? Give me some more ideas!


Photobucket

Wednesday, November 9, 2011

Easy Applique


If I can applique, anyone can do it! I’m flying to Houston next week (girls’ weekend!) to see my Bestie, Jennifer, and I want to take some treats to her three kiddos. These are not the kind of treats that the kids will appreciate, but their Mommy sure will! She’s already seen the pics of the shirts, so I’m not ruining any surprises! Smile 

I only learned how to sew back in March when I took a four week sewing class with my Seester, Drennon. We learned to make a child’s “Johnny” romper, and the sewing bug hit. I can’t do anything fancy, but if I can make an entire quiet book from scratch, then anyone can learn to sew!
I bought three t-shirts (2 girls, 1 boy) from Wal-Mart at $3.88 each, as well as some Christmas fabric from JoAnn’s a few weeks ago on sale. I only needed a 1/4 of a yard, so the fabric only cost a couple bucks, if that. The girls’ shirts were easy. I cut out a Christmas tree and sewed it on their shirts and placed a button at the top for a “topper”. The boy’s shirt was a little harder because I thought the tree was a little “girly” for him. I finally decided on an “a” for Alex. I made the “a” using Word Art in Microsoft Word. The font is “Howser”. All I did was stretch it on the screen to the size I needed and then printed it out.
Screen Shot
I then made sure the size of the letter would work on the shirt. I traced around the letter with a Sharpie (my black ink was running low in my printer) so it would show through the back of the page (more on that below).

Heat n Bond is your best friend when making an applique! It eliminates the need to pin your fabric to the clothing. Make sure you follow the package instructions when ironing it on your fabric.

One thing to remember when using Heat n Bond is that you need to reverse your image on the smooth side of the paper so it will turn out correctly on the fabric. (I think there is a way to do this in Word, but I don’t know how yet!) This will make much more sense when you are actually working with the paper! I turned my computer paper over (the side with the “a” printed on it), traced the “a” on the back side of the paper, placed the Heat n Bond on top of the paper, and then traced again onto the Heat n Bond. Clear as mud?!

Cut around your letter so there’s not much paper around the edges (this keeps you from wasting fabric). Then, use your iron to bond the paper to your fabric. Again, follow the package directions.

Once the paper is bonded to the fabric, cut out your letter and make sure it looks good on your shirt.

Then peel of the paper backing to reveal the “glue” that will hold your fabric to the shirt. It will be shiny but not sticky.

Place your letter on the shirt exactly where you want it to stay and then iron it on. It’s so easy!

Once your letter is bonded to the fabric, it’s time to sew! Pick out a coordinating thread and sew around the edges of the letter. I’ve used a zig zag stitch as well as a straight stitch in the past. For this project, I chose a “tight” straight stitch in bright green. Don’t forget to sew around the middle hole if your letter has one!

Here are all three shirts! I am so excited to get these on those three kiddos! I made E a tree shirt too! Hers is white with a red button.

The total for all three shirts was about $15 since I already had the thread, buttons, and Heat n Bond.


Beth

Linking up to these fabulous parties!
Tatertots & Jello, Between Naps on the Porch, My Uncommon Slice of Suburbia, Serenity Now, Mommy By Day Crafter By Night, The 36th Avenue, The DIY Showoff, Today’s Creative Blog, At the Picket Fence, Home Stories A to Z, Gingerbread, Remodelaholic, Thrifty Décor Chick, The CSI Project, Beneath my Heart, Crafty Scrappy Happy

Monday, November 7, 2011

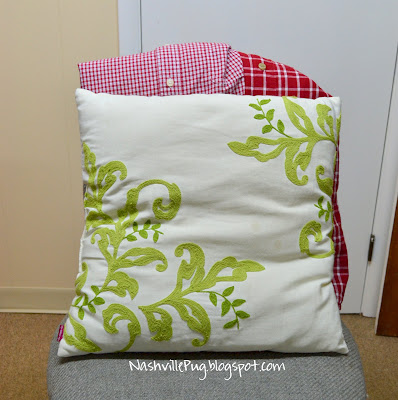
Men’s Shirt Christmas Pillows


I went to Goodwill a couple of weeks ago looking for some cable knit sweaters, so I could make some winterized and cozy pillows for our den. I didn’t see any sweaters that I really loved, but I did see these two button down shirts that screamed “make me into Christmas pillows!”! I had seen this tutorial on making pillow covers from men’s shirts, so I knew what I had to do. The shirts were $5 each; not a steal, but I thought they were worth a try. Doesn't that look like a Christmas plaid?

We have two of these pillows residing on our den couch that I wanted to use. They measure 20x20, but I made the pillow covers about 18x18 so they would fit snugly. I like the idea of being able to take the covers off once Christmas is over and not having a bulky pillow to store.

To make the pillow covers, keep the shirt buttoned and use a rotary cutter to slice through both the front and back of the shirt at the same time. For the first shirt, I cut through the side seams, and this was not the way to do it. It really goes a lot faster if you lay your shirt flat, lay your pillow on top and eyeball the size, then cut with your rotary cutter. Plaid shirts make it super easy to cut since you can just follow one of the lines with your rotary cutter. Make sure you pay attention to the pocket on the shirt (if it has one). I liked the little extra detail it gave the cover, so I left the pocket on and worked around it.

Once your pieces are cut, turn them right sides together and sew around all four sides using about a 1/2 inch seam allowance. I love that you can sew all four sides since the button down part of the shirt acts as your opening. No going back and hand stitching!
Isn’t it cute?! I love the extra detail that the buttons add to the pillow.

And guess what? These can be taken off and thrown in the washer! How awesome is that?!

Here they are looking all nice and cozy on our den couch.

I played around with a few different layouts of the pillows…

And decided that I liked the buttons facing out the best!

There are so many different possibilities when using button up shirts as pillow covers! Go raid your husband’s closet and turn those ugly shirts into cute pillow covers! I’ve got my eye on several of Ben’s shirts…


Beth


Linking up to these fabulous parties!
Tatertots & Jello, Between Naps on the Porch, My Uncommon Slice of Suburbia, Serenity Now, Mommy By Day Crafter By Night, The 36th Avenue, The DIY Showoff, Today’s Creative Blog, At the Picket Fence, Home Stories A to Z, Gingerbread, Remodelaholic, Thrifty Décor Chick, The CSI Project, Beneath my Heart, Crafty Scrappy Happy, Nap Time Crafters, At Home with K

Wednesday, November 2, 2011

Toddler Bean Bags by 517 Creations


Boy I have I got a treat for y'all today! When MJ from 517 Creations asked to feature my Pottery Barn Project Table Knockoff a couple of months ago, I had no idea we'd become fast bloggy buds! MJ was so nice to help me with some Blogger brain farts I had, and we've been emailing and commenting back and forth ever since. Don't you just love the WWW?! I told her that if we lived in the same city, we'd for sure be best buds. But, on to the treat for today! MJ is here to share her toddler bean bags tutorial. I think they are the cutest and can't wait to make some for our little tornado sweetie! Take it away MJ!
Happy November!  I'm so excited to be guest posting here at Nashville Pug, my bloggy buddy Beth's blog - say that 3 times fast! :)
My name is MJ and I can usually be found blogging over at 517 Creations. I  hope you'll grab a cup of coffee, pop on over, and read a few of my posts...after you're done reading this one, of course!
On to the tutorial...
Photobucket
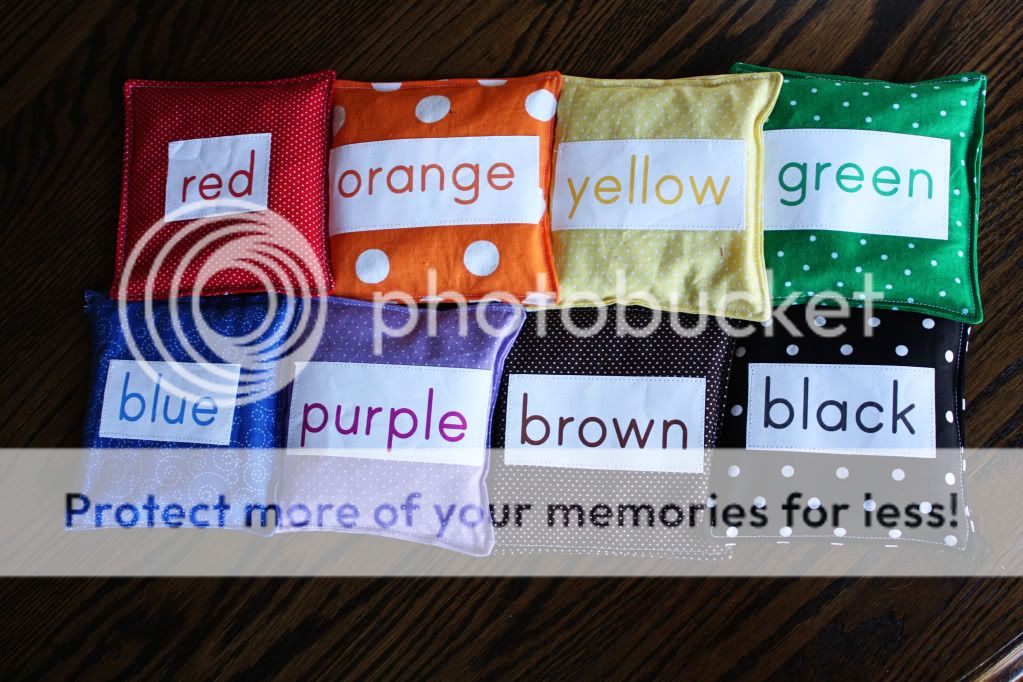
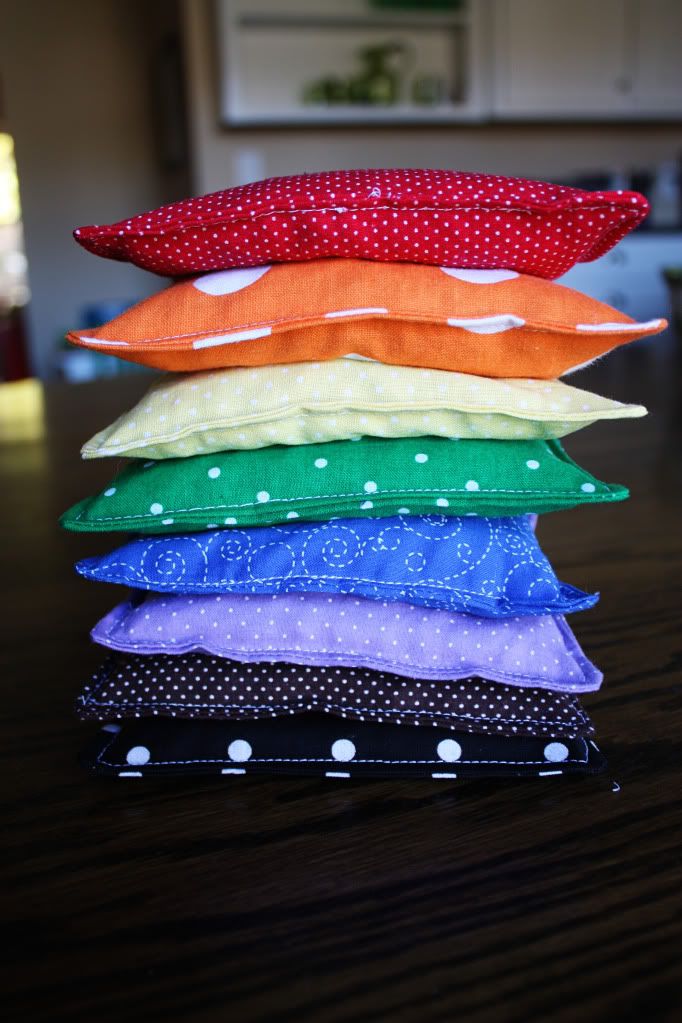
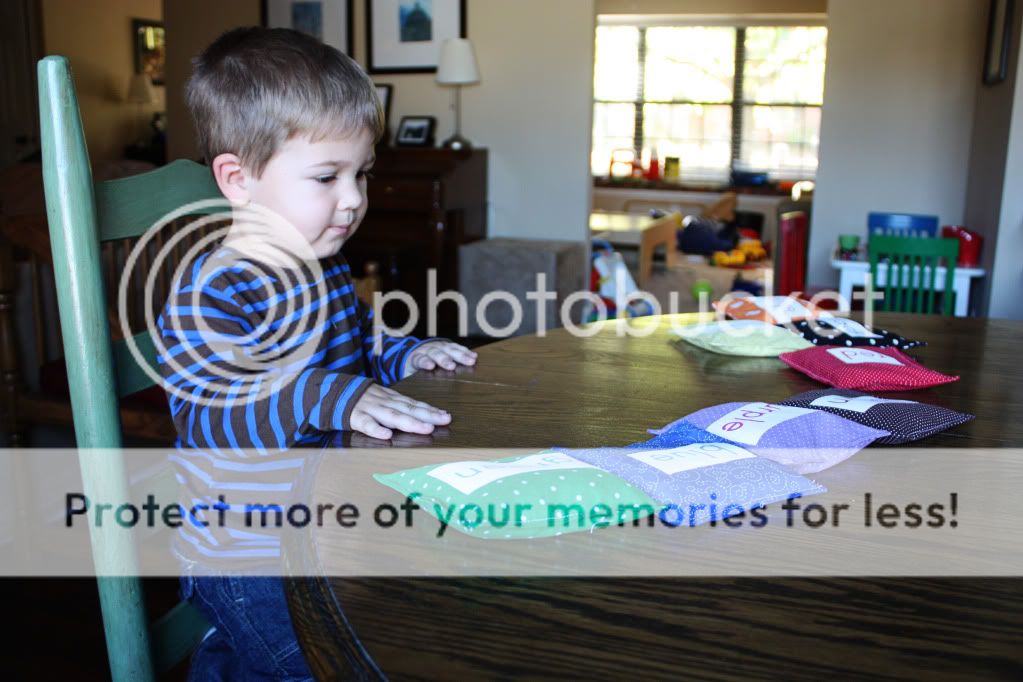
I love these “Toss and Learn: Colors” bean bags that I created a few months ago.  They are the perfect present for any toddler in your life.  Bean bags help with gross motor skills and sensory integration, and these help with color recognition…says the former teacher in me.  :) We all love bean bags, right?
Of course, we are talking about bean bags here, so they’re pretty simple to make.
Here’s what you’ll need:
8 different fabrics (red, orange, yellow, green, blue, purple, brown, black). 
You could add more or less depending on how many colors you want.
      Coordinating or contrasting thread      
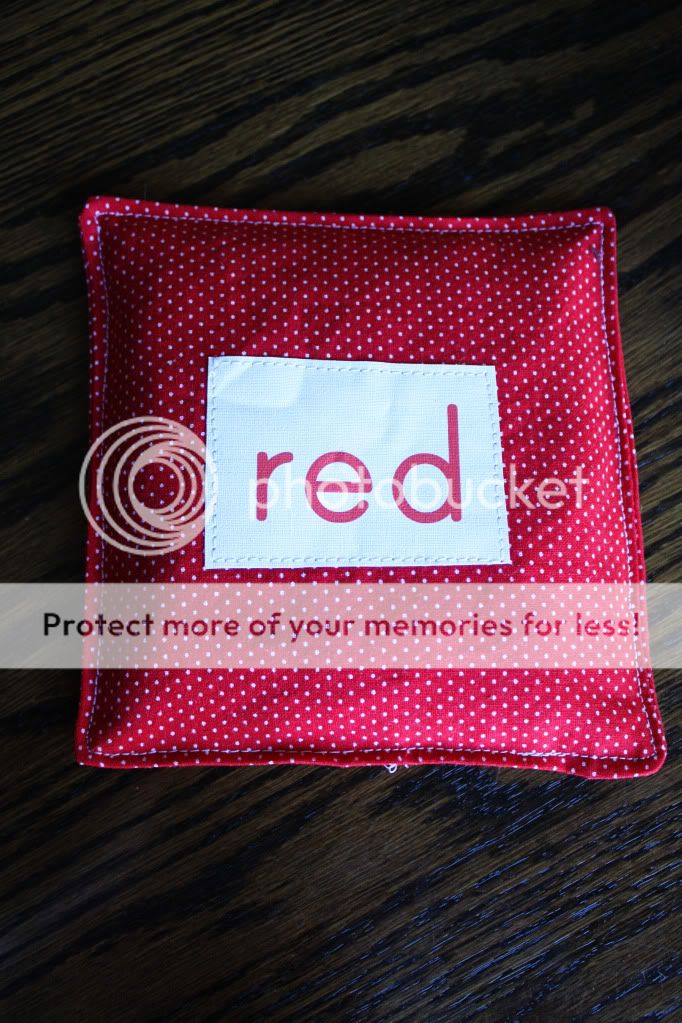
Printable fabric – this adds an extra little bit, but I think it makes these bean bags what they are!  This can be found at most fabric stores.  I bought mine at Hobby Lobby with the 40% coupon!
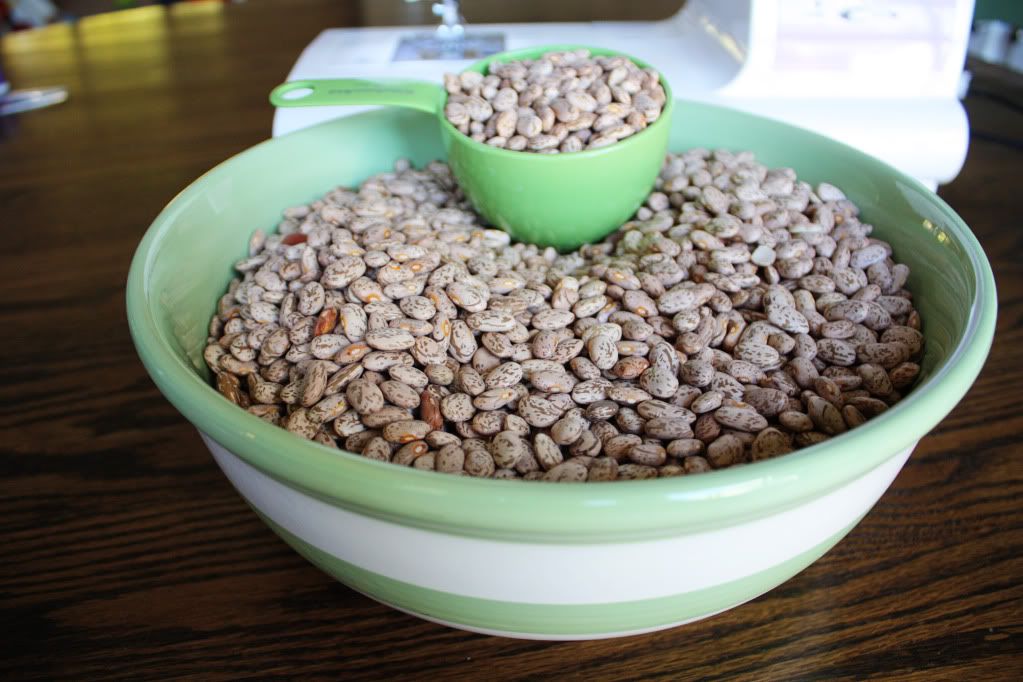
Beans – this takes more beans that you’d think! (A funnel makes this job much easier!).  I used pinto beans as they are sold in large bags at Wal-mart. 

Photobucket
Step One:
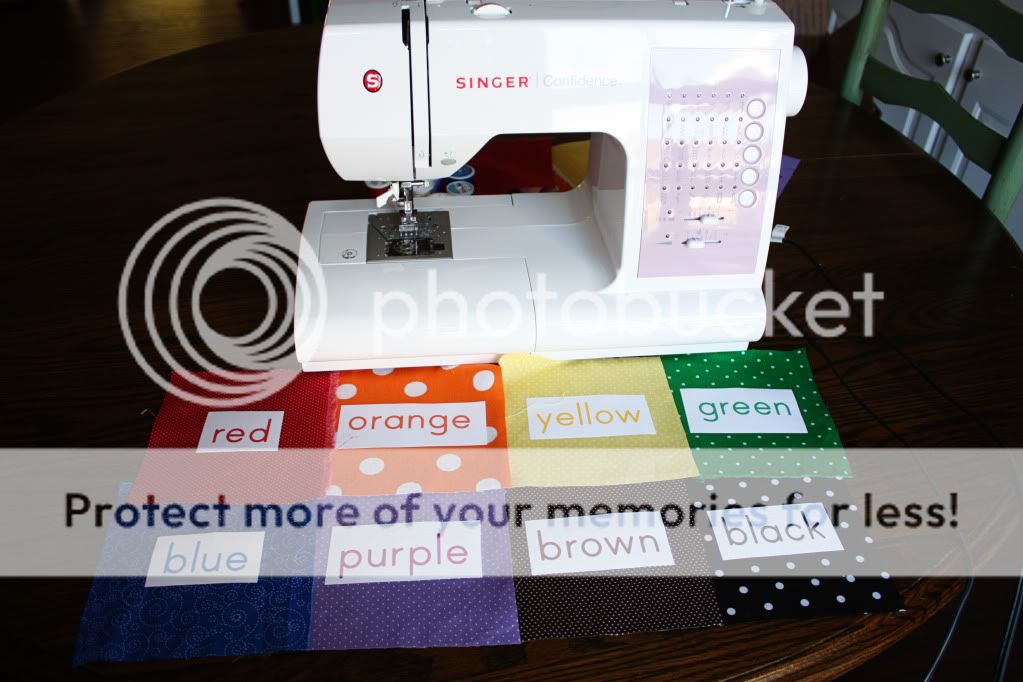
Following the directions on your printable fabric, print the names of the colors on a single page.  If you’re interested in a .pdf of this, e-mail me!  The printable fabric that I used had to dry for a few minutes, so I recommend doing this step first.  Cut your color names apart – be sure to size them so they’ll fit on your bean bags.
Photobucket
Step Two
Cut your fabric into 6-inch squares.  If you have a cutting mat and rotary cutter, this step goes by quickly!
Step Three:
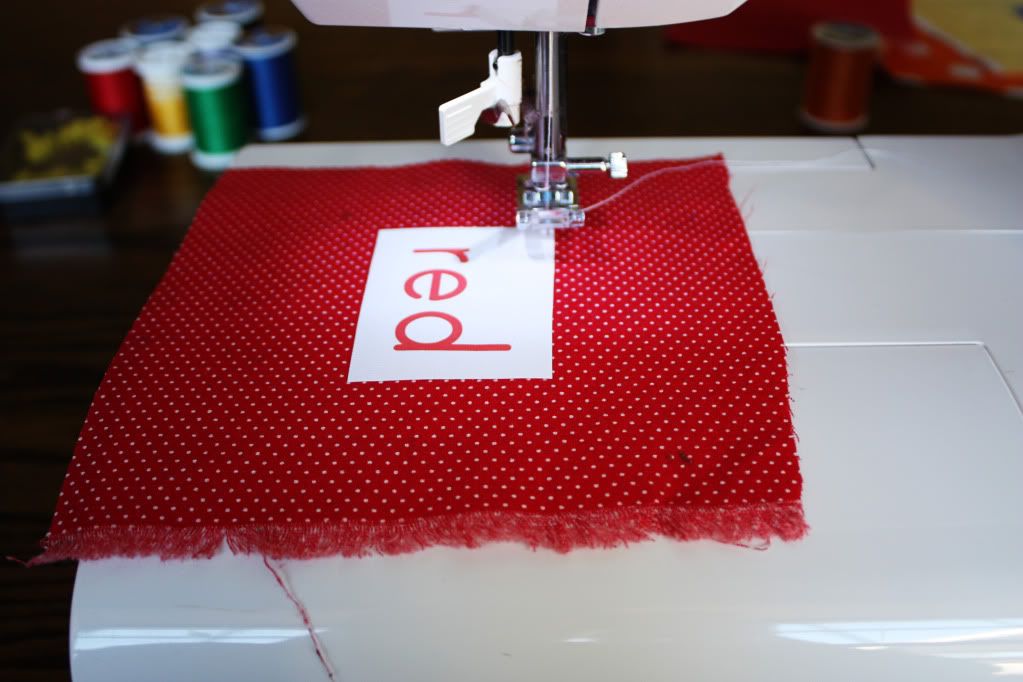
Lay out 1 side of each “bag”.  Pin the color name to one side of each “bag”.  Sew your color names on! You could use a fusible webbing to help secure it.  The printable fabric that I bought already had the fusible webbing on the back, so it made it a little easier. Be sure to back-stitch to secure it!
Photobucket
Photobucket
Step Four
After each color name has been sewed on, match up both sides of your bags and pin them together.  Be sure that the RIGHT SIDES of the fabric are together, and sew with a ¼ seam allowance.  Be sure to leave a 2-3 inch opening along one side of each bean bag – this is where we’ll put our beans in.

Step Five:
Clip the corners, turn the bean bags right-side out (be sure to poke the corners out), and iron flat.
Step Six:
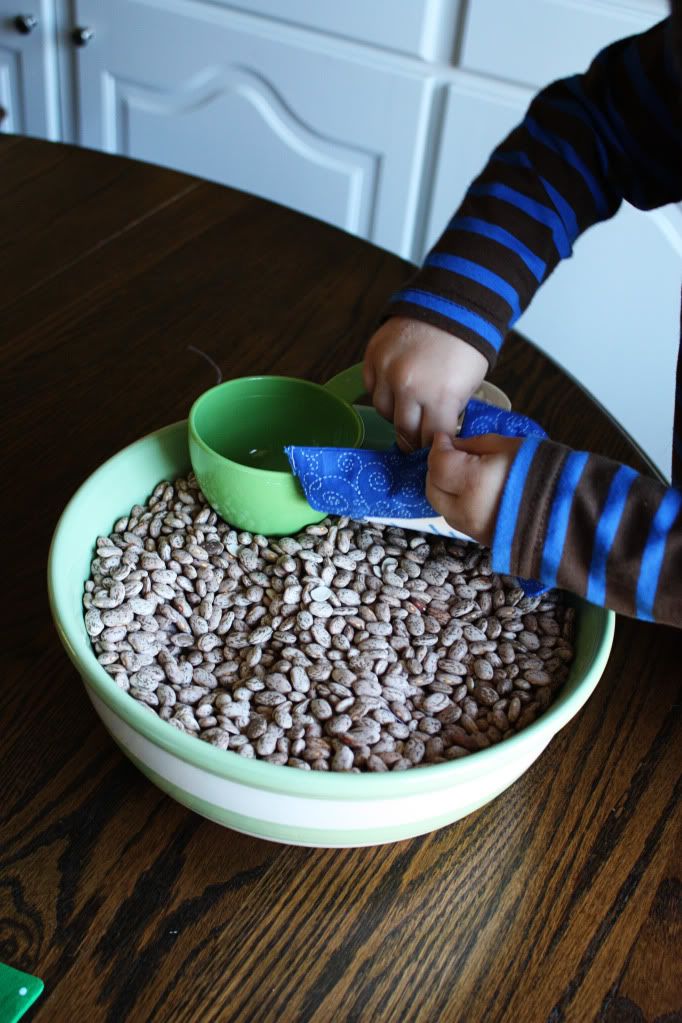
Fill the bags using whatever type of beans you have on hand.  One cup seems to be a good amount to fill this size bag.
Photobucket
It helps if you have a trusty assistant!
Photobucket
Step Seven:
After you have filled the bags, pin the opening shut.  Then either hand-sew or machine-stitch the opening closed.  I like to machine-stitch it, and then top-stitch around the entire bag for added strength…we do have a 2-year old boy in the house!  If you top-stitch around your bags, you’ll have to move the beans out of your way as you sew.  This takes a little practice to move them to one side or the other, but you’ll get the hang of it!
Photobucket
Step Eight:
You're done!  Enjoy your Toss and Learn: Colors bean bags!
Photobucket
Step Nine:
Make your cute little toddler’s day by “letting” him practice his colors while playing with the bean bags!
Photobucket
You can take this concept of "Toss and Learn" and use it to teach all kinds of skills...letters, shapes, numbers, etc.  Start a little bean bag-making factory in your sewing room this weekend!
Thanks so much MJ! Aren't the bean bags so neat?! They are definitely on my list of things to make for E very soon. Be sure to also check out MJ's series "31 days of warming up to the Holidays" that she just wrapped up on her blog. The link is below. She has lots of great printables and Christmas ideas!


Beth

Monday, August 29, 2011

Quiet Book

I wanted to make Elliotte something special for her 2nd birthday. I decided on a quiet book after doing A LOT of online research. I stalked Pinterest and lots of blogs (links to sources are bolded). My goals in making the quiet book were that it should be gender neutral (I didn't want to make an entire new book should we have a boy next), and I wanted to be able to add pages in the future. The book measures about 11x11 inches and has some thin batting between the pages to keep it soft (and quiet!). If you can sew a straight line and know how to use your sewing machine on a beginner's level (I've only been sewing about 5 months), you too can make one of these! I love the fact that it is handmade and will be enjoyed for many years to come.

For the front and back covers, I used fabric I already had on hand. I thought it was fun and colorful. The book stays closed with a velcro flap and grommets will allow me to add pages in the future.


Since E loves Mickey Mouse Clubhouse, I had to include a Mickey page. His red pants pull back to reveal a small pocket. Felt apples button on and off the apple tree on the 2nd page. The apple tree design was inspired by this blog.


Ice cream scoops velcro on and off the cones for a mix n match look. The ladybug unzips so E can hide things inside. This was my first zipper!


The red, felt barn doors open to reveal five friendly farm animals that are finger puppets! The puppets were bought from cherylasmith on etsy. They are absolutely adorable and E loves them! I found the barn template here.


The next page is a sun and grass page so E can create a "farm scene" with her animals.


This page about made me want to strangle someone! Each number has buttons to help E learn to count. It's not the best looking page in the book (check out #6!), but she really likes it. Thank goodness my sewing machine does buttons!


She had to have a mailbox to receive all her mail. The flap folds down so E can put notes and cards inside. The flag goes up and down too! The mailbox template was found here.


And here's my favorite page!!! This page is 100% original, and I am so proud of it! The pug's ears are floppy in true pug fashion. Too bad it's not real...


The final two pages allow E to dress up a doll. The undergarments are velcro, so the clothing will stay put! The right page is a large pocket to store the doll's clothes. I still need to make a few more outfits. The template for the doll and clothes was found here.


The End!


Linking to Home Stories A to Z

Polly Want a Crafter

all crafts Homemade Projects ~ Add Yours {9/19}

Posted by Picasa