Su, Me, Lu, and Heather. We are missing our other two peeps, Claire and Kristen, who didn’t get to make the trip this year.
At least once a year, my girlfriends from childhood (we went to school together for 12+ years!) get together for some kind of weekend trip. This year we chose Atlanta for the relatively short drive and shopping. We went shopping, ate, slept, and went shopping! Stops during the weekend were an outlet in Dawsonville, GA, IKEA (I was a first timer and fell in love), Lenox Mall, Crate & Barrel, and not one, but TWO Ballard Designs outlets! I had no idea there was even one Ballard outlet, so when we found out there were two, we had to check them out.
One of my finds at the Ballard Outlet were $5 burlap pillow covers! I scooped up several knowing exactly what I wanted to do with them. I've been dying to stencil something, and I finally found my project!

For this stenciling project, I used freezer paper. For those of you not familiar with freezer paper stenciling, check out this tutorial. It is so easy!! I’ve been wanting some personalized pillows for our front porch with our monogram and house number, so that’s what I decided to do. I found a font in Word I liked, enlarged the letters and numbers to fit the scale of the pillows, printed them out, and then used my exacto knife to cut the stencil out on the freezer paper. An exacto knife is really key to cutting out the stencil since you want really precise cuts so the paint won’t leak under the paper.
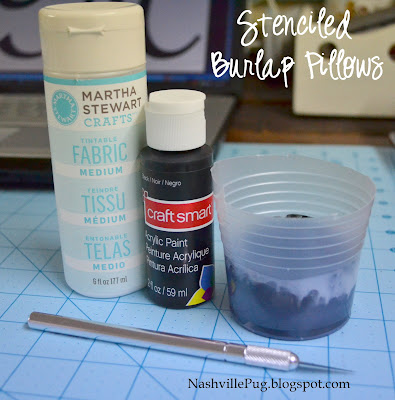
To make my paint fabric-ready, I added some fabric medium to it. You can also buy paint made specifically for fabric, but I didn’t have any of that kind of paint.

Here is my stencil all cut out and ironed onto my fabric. The shiny side of the freezer paper goes against the fabric, and once ironed, adheres to the fabric until you peel it off. So cool!

Before you begin to paint, make sure you place something under the fabric so the paint does not bleed onto the other side. I used aluminum foil for some strange reason, but it worked really well. I used a sponge brush to paint the fabric so I could help push the paint into the rough burlap. I just dabbed a generous amount of paint all over the fabric to make sure it was well covered.

Here’s what your stencil will look like once it’s been painted. You should not have to worry about it bleeding around your stencil if it’s been ironed on well. You’re supposed to leave the paper on the fabric until it is dry, but this impatient stenciler pulled it off after only about 15 minutes! I couldn’t wait, and it turned out fine! I guess you could have a problem if you ended up needing another coat of paint…

The house number pillow is my favorite! I think it will add such a personal touch to our front porch. The layout of your numbers will depend on how many you have. I made one for my Mom as well using three numbers placed diagonally from the top left corner to the bottom right corner.

Don’t forget to save any small pieces of paper that go inside letters and numbers like the ones for the “8”. Let your paint dry a few

Let me tell you, it was so much fun peeling off that freezer paper and seeing perfectly stenciled letters and numbers! I now see why so many bloggers say freezer paper stenciling is addictive!
Here's a completed pillow looking pretty on our front porch!


A little side by side comparison.


Have you stenciled with freezer paper? I hope I've inspired you to give it a try!

Linking up to some of these fabulous parties! Tatertots & Jello, Between Naps on the Porch, My Uncommon Slice of Suburbia, Serenity Now, Mommy By Day Crafter By Night, The 36th Avenue, The DIY Showoff, Today’s Creative Blog, At the Picket Fence, Home Stories A to Z, Gingerbread, Remodelaholic, Thrifty Décor Chick, The CSI Project, Beneath my Heart, Crafty Scrappy Happy, Perfectly Imperfect, One Artsy Mama


