Showing posts with label spray paint. Show all posts

Monday, October 24, 2011

Playroom Gallery Wall


I decided to make some changes to Elliotte’s playroom this weekend. I’ve been wanting to add a chalkboard to the wall so she can draw and color to her heart’s content. Anything to keep her occupied for a few minutes! I also wanted a place where we could display her “artwork”. I picked up a thin piece of plywood from Home Depot and painted it with chalkboard paint. I also got some trim so I could add a frame to the chalkboard. After cutting the trim with a friend’s miter saw (the cuts with the miter box last time were too rough, and I really wanted to use a miter saw!), I hot glued the frame together and then spray painted it.


Below is a pic of the green paint I started out with. It was WAY too bright, so I went with a softer blue, and it turned out much better.


The color is Peekaboo Blue by Krylon.


Much better!


After the paint dried, I glued the frame to the chalkboard with Liquid Nails and placed some of Ben’s weights on top to make a good seal. After a few hours, it was ready to hang!


Here’s the chalkboard all finished along with a new gallery wall! I am so excited about E’s new gallery wall in her playroom! The white frames are from Michael’s, and I plan to paint them a few different colors. The pink frames are from Goodwill. I spray painted them and added some scrapbook paper and metal clips to display artwork.


The table and chairs were mine when I was little and they received an update a few months ago.


E now has a proper place for tea time!


I ordered these baskets from WUSLU knowing that I would use them for playroom storage. The bottom basket holds favorite friends, and the top basket holds E’s chalk for now.


E can draw on her tabletop too! It’s coated in chalkboard paint as well.

I still need to fill in two of the white frames, but I couldn’t wait to post about the new gallery wall! I can’t wait to see E playing in here now and all the pretty pictures she will draw on her new chalkboard!


Please excuse the horrible lighting in these pictures! The playroom is in the end our basement that does not have any natural light! It’s a fabulous space, but you have no idea if it’s day or night!

Beth


Linking up to these fabulous parties!

Wednesday, October 5, 2011

Family Room Redo

I am so excited to share my Family Room Redo with you! Our family room has been a work in progress for a long time (almost five years!). I painted the walls Cape Red when we moved in five years ago because I was in my red, green, brown, gold phase. I got over that a couple of years ago, but didn’t really have time to change anything in the room until recently. Several months ago, we painted the room a soft yellow to brighten things up and moved our HUGE brown couch, chair and ottoman to the “man room” downstairs. I shopped my parents’ basement for a “new” couch and chair that better fit the scale of our room. I felt like I was in a new house! Of course, that started the slippery slope of me wanting to change EVERYTHING!
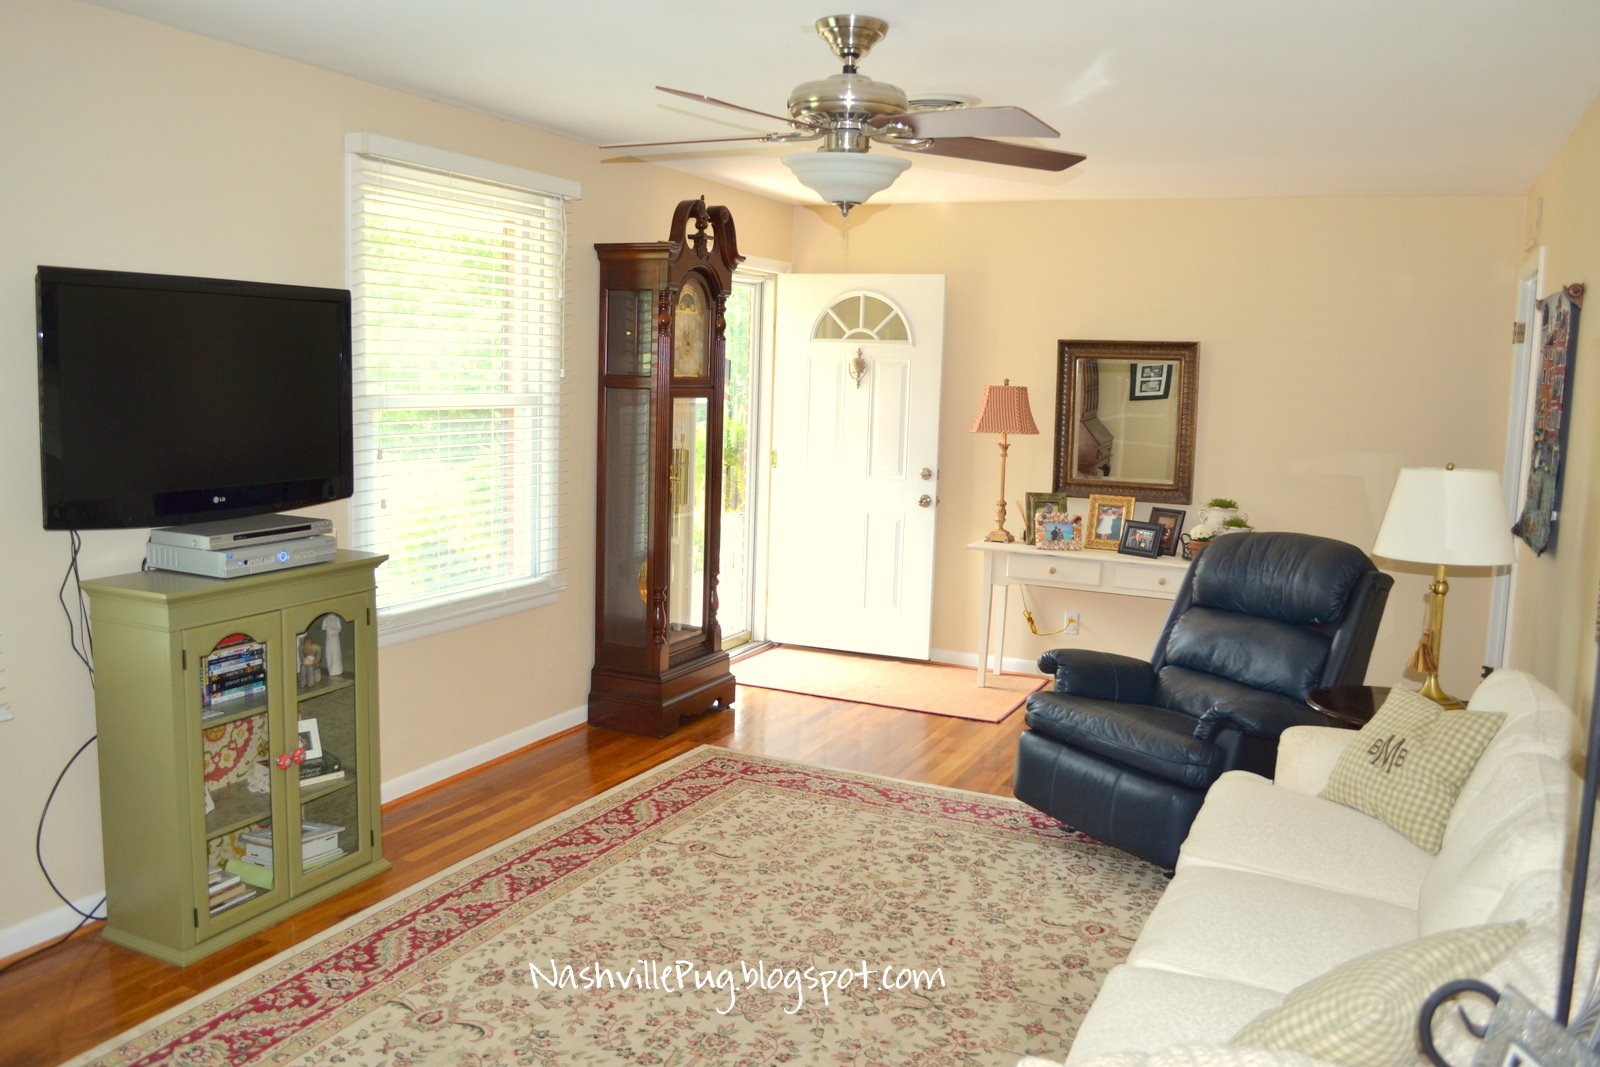
Before: This is how the room looked back in the spring after the couch and chair switcheroo. I can’t find older pics of the rom for some reason. We had our house for sale, so everything was neat and tidy and minimal. The flat screen TV was hung on the wall on the right with a green cabinet underneath. It was positioned between two windows, which was where I thought it needed to go because of the couch position.
Before:

After:

Here’s the TV wall now! I moved the buffet from the kitchen into the den to serve as a media cabinet. I plan on making some sort of gallery wall around the TV, so I’ll have to do another update! The desk/hutch that was in the right corner of the room was moved to the wall between the windows where the TV used to reside. The desk/hutch is one of my favorite pieces of furniture and was given to me by my Nanny and Granddaddy when I was young. It’s got history to it, and I’ll never part with it! It’s also something I’ll never paint.
I found a rattan storage chest at TJ Maxx for $30 to corral all of E’s toys in the den. It doesn’t look like a toy chest and adds some texture to the room.
The couch wall has changed quite a bit. I made the wood shim sunburst mirror over the summer and slipcovered the couch with one of my winnings from a blog contest. The couch was white, and now it has a cream, twill slipcover on it. I spray painted the round side table yellow and gave the lamp a makeover. Hopefully the blue recliner will be replaced in the near future!

Before: Here’s the TV wall looking in the direction of the front door back in the spring. I really like the green media cabinet, but it just wasn’t substantial enough for the den. It’s now in the guest bedroom and looks so much better.

After: I moved the blue, club chair over by the window so it faces the TV. It sits in front of another of my favorite pieces, our Grandfather clock. Again, it was given to me by my grandparents, this time as our wedding gift. I hope to pass it down to E one day. The lamp by the chair received a makeover too. I think this seating arrangement lends itself more to conversation since the chairs and couch are closer together.

Before: The couch wall. This arrangement stayed the same, but I changed up the accessories.

After: You have a better view of the couch, mirror, and display shelf in this picture. The slipcover has been so useful. I just pull it off and throw it in the wash. So easy. And I love it when E looks up at the mirror and says “Mommy make it!”.

I use the shelf to display family photos. I think the pictures people have in their home tell a lot about them. Pictures make a house a home, and I like being reminded of my amazing family. The door beside the shelf leads into the kitchen. It will be getting a major makeover here very soon!

Here’s a pic of the table beside the front door. This table used to be a darker wood. I spray painted it Rustoleum Heirloom White over the summer and distressed it. It lightened up this wall so much! Of course, I have more family pics displayed here too. I’m not attached to this mirror and am thinking of how I can change it up a bit.

I hope you’ve enjoyed my family room tour. I have enjoyed making it over, and it feels so much more like home to us now! Ben and I both will be sitting in here watching TV and just say “I love this room now”! It’s amazing how just rearranging furniture and changing out some accessories can make such a difference in a room?
Are you a rearranger like I am? Happy Wednesday!

Beth


Linking up to these fabulous parties!
Tatertots & Jello, Between Naps on the Porch, My Uncommon Slice of Suburbia, Serenity Now, Mommy By Day Crafter By Night, The 36th Avenue, The DIY Showoff, Today’s Creative Blog, At the Picket Fence, Home Stories A to Z, Gingerbread, Remodelaholic, Thrifty Décor Chick, The CSI Project

Monday, October 3, 2011

Lamp Makeover


Once I completed my table makeover, I expressed my desire to makeover the lamp, shade and base included. I had a few things in mind, but I really wanted to see some texture. When I saw Centsational Girl's sisal rope bowl,
sisal rope bowl by kate
I knew that some sisal rope was needed in our home somewhere!

Here is the lamp before. The shade was boring and the base was too gold for my taste.


For the shade, I grabbed some sisal rope from Home Depot, along with my trusty glue gun.


I started gluing the rope along the back of the shade at the seam. Be careful not to use too much glue because it could melt through your lamp shade! Keep winding and gluing until you get to the top.


In addition to the sisal rope lampshade, I sprayed the base of the lamp with some oil rubbed bronze paint. I love how it looks!


It really looks like an ORB lamp.


I think the lamp really makes the room look more pulled together, and the sisal rope looks great with the wood shim sunburst!


Linking up to these fabulous parties!
Tatertots & Jello, Between Naps on the Porch, My Uncommon Slice of Suburbia, Serenity Now, Mommy By Day Crafter By Night, The 36th Avenue, The DIY Showoff, Today’s Creative Blog, At the Picket Fence, Home Stories A to Z, Gingerbread, Remodelaholic, Thrifty Décor Chick, The CSI Project

Posted by Picasa

Monday, September 26, 2011

Fall "Mantel"


We don't have a fireplace in our house, so therefore, we do not have a mantel. I miss having a mantel to decorate with the seasons and holidays. After seeing all the amazing mantels on Pinterest, I decided it was time to remedy my mantel-less situation.

Since adding a fireplace to our house was not going to happen, I decided to make a "mantel". I had seen Shelley's kitchen shelves tutorial here,

and knew that I could make some too. So, off to Home Depot I went. I decided I wanted my shelves 3 feet and 4 feet long, so I purchased an 8 foot long 1x6 ($7.22) and had the guy at Home Depot cut it for me. I had found some brackets that I really wanted to use, but they were $6.85 each, and I needed four. I found some cheaper brackets that were not as pretty but would do the job for $1.98. Problem was, there was only two of them. Here's where it pays to chat up the associates at your favorite stores. I told the guy cutting my board that I had found two brackets but needed four and that there were other brackets I loved but were too expensive. What did he do? He gave the prettier, more expensive brackets to me for the cost of the cheap ones! SCORE! I got four, really pretty, more substantial wooden brackets for $7.92! He told me it was their fault they didn't have what I needed, and you should always ask for an upgrade when that happens. I think I thanked him about 100 times.

Below is one of the beautiful brackets!


Ben and I actually worked together on this project. Those that know us, know we do not work well together. We almost killed each other once on a canoeing trip because we both are crazy stubborn, and I like to be in charge. Big surprise. We will never go canoeing again.
Ben helped me cut the trim for the shelves with the miter box (still don't have that 12 inch miter saw with a laser). I actually only got frustrated once during the whole process! After all that cutting, we both decided that the shelves looked better without the trim. If I change my mind, I've got it already cut and ready to go...

Here is my priming station all set up under the carport one night. Yes, those are diaper boxes. I used spray primer for the first coat, and then gave the wood a good, fine sanding. But for the actual paint I used, wait for it........regular paint and a real paint brush and roller! Shocker, I know.


I used Glidden Antique White in semi gloss because this color will be showing up on my kitchen cabinets in the very near future. I added some Floetrol to my paint after reading Centsational Girl's praises of the stuff. It's supposed to minimize brush strokes in latex paint, and let me tell ya, it does! I am now in love with Floetrol. There is not a brush stroke to be found on my shelves. It makes me want to paint my kitchen cabinets yesterday.


Here's my painting set up on Sunday. I had to position myself in the garage so I could see the "man room" TV since the Titans were playing.


Hoover was my painting companion this time. Had to give the mutt some blog time too.


And here are my new shelves, all ready for fall decor, hung in the dining area of our kitchen!


Now I have not one, but TWO "mantels"! I am in love with my new shelves. In total, they cost just $16 to make!


I added some pumpkins and gourds that came from Michael's and Wal-Mart. The little urns had silk flowers in them and were on clearance. I knew I could pluck the flowers right out and use the urns for something else.

The wreath was a $2.50 Michael's find. The "M" I already had.


Love this little wire basket I found at PD's in Franklin.


The tray was a hostess gift and has leaves and acorns on it. I found a great place to display my WUSLU bottles and caddy!


One last look...I love it!


I'll be linking up  to the Fall Mantels party at The Lettered Cottage!
The Lettered Cottage

And here as well:
Visit thecsiproject.com  Todays Creative Blog Domestically Speaking   Weekend Bloggy Reading The DIY Show Off Remodelaholic    The DIY Show Off  mY Uncommon Slice of Suburbia 

Posted by Picasa