Showing posts with label paint. Show all posts

Wednesday, December 21, 2011

Oh What Fun!

Elliotte and I had a little messy fun the other day! I broke out the washable paints and let E do her thing. She loves to paint at school, so I knew she would love to paint at home too. Every Tuesday and Thursday when I pick her up from school and ask what she did that day, she says "PAINT!" with tons of enthusiasm.

So that's what I let her do...we started with green.


I had envisioned a "hand print" Christmas tree, but E had other ideas...and that was fine.


Then we moved to yellow.


And finished with a little red.


When she started to paint herself, that's when I called it quits!


Luckily a dip in the tub took it all away.


What are some activities you do with your kids to beat the winter blues?
Christmas is just a few days away!! Are you ready?


Photobucket

Monday, November 21, 2011

Yellow Door, Yellow Door, What do you see? (Corrected Post)


*Update: I'm so sorry if you could not see the "after" pics when I posted this last week (silly Blogger). It should be all fixed now if you don't mind taking another look!


I've been contemplating painting our front door for a couple of years now. Before we replaced our exterior doors a few years ago, I had painted our front door black to match our shutters. We had white, steel doors installed, and I have been reluctant to paint the front door since (very unlike me!). Well, I finally got over it! The white wasn't bad, but it just didn't have the pop of color I've been wanting for our front door. I didn't want to do boring black again and have it blend in with the rest of the houses in our neighborhood. I had thought about red, but our house is red brick, so that wouldn’t look good either. So, what did I do? I painted the front door yellow!
I decided on Glidden's Goldenrod in semi-gloss. It was the first yellow I was drawn to while standing in front of all the swatches. After removing all the hardware, I primed the door first to make sure the paint would "stick". Then I brushed and rolled on several thin coats of paint. It really killed me that I couldn't spray paint the door! That would have been too much trouble for such an easy project.
Here was my set up last Sunday afternoon. I completed this while E was napping. I left all the hardware off the door for the rest of the day and did not close the door until the following day. I was really worried about it sticking. (And yes, Jessie, my front door was unlocked and wide open or cracked for a solid 24 hours! Ha!)


You will always find two lazy dogs lying around while I'm painting.


Here's the finished, outside view! The storm door has a horrible reflection in the picture, but it still allows the yellow to shine through!


View from the walkway. You definitely notice the new color when driving by! Ours is definitely the only yellow door on our street!


Here's a before shot of the porch with the plain, white door. Now that it’s yellow, the white door looks so plain and sterile.


Inside view of the door. Our front door is always open when I'm home, so the yellow really helps to brighten up the room. I love all the natural light the storm door lets inside, and the dogs love to lay in the morning sun.


Have you painted your front door a fun color?


Photobucket


Linking up to these fabulous parties!
Tatertots & Jello, Between Naps on the Porch, My Uncommon Slice of Suburbia, Serenity Now, Mommy By Day Crafter By Night, The 36th Avenue, The DIY Showoff, Today’s Creative Blog, At the Picket Fence, Home Stories A to Z, Gingerbread, Remodelaholic, Thrifty Décor Chick, The CSI Project, Beneath my Heart, Crafty Scrappy Happy, Perfectly Imperfect

Monday, October 24, 2011

Playroom Gallery Wall


I decided to make some changes to Elliotte’s playroom this weekend. I’ve been wanting to add a chalkboard to the wall so she can draw and color to her heart’s content. Anything to keep her occupied for a few minutes! I also wanted a place where we could display her “artwork”. I picked up a thin piece of plywood from Home Depot and painted it with chalkboard paint. I also got some trim so I could add a frame to the chalkboard. After cutting the trim with a friend’s miter saw (the cuts with the miter box last time were too rough, and I really wanted to use a miter saw!), I hot glued the frame together and then spray painted it.


Below is a pic of the green paint I started out with. It was WAY too bright, so I went with a softer blue, and it turned out much better.


The color is Peekaboo Blue by Krylon.


Much better!


After the paint dried, I glued the frame to the chalkboard with Liquid Nails and placed some of Ben’s weights on top to make a good seal. After a few hours, it was ready to hang!


Here’s the chalkboard all finished along with a new gallery wall! I am so excited about E’s new gallery wall in her playroom! The white frames are from Michael’s, and I plan to paint them a few different colors. The pink frames are from Goodwill. I spray painted them and added some scrapbook paper and metal clips to display artwork.


The table and chairs were mine when I was little and they received an update a few months ago.


E now has a proper place for tea time!


I ordered these baskets from WUSLU knowing that I would use them for playroom storage. The bottom basket holds favorite friends, and the top basket holds E’s chalk for now.


E can draw on her tabletop too! It’s coated in chalkboard paint as well.

I still need to fill in two of the white frames, but I couldn’t wait to post about the new gallery wall! I can’t wait to see E playing in here now and all the pretty pictures she will draw on her new chalkboard!


Please excuse the horrible lighting in these pictures! The playroom is in the end our basement that does not have any natural light! It’s a fabulous space, but you have no idea if it’s day or night!

Beth


Linking up to these fabulous parties!

Monday, September 26, 2011

Fall "Mantel"


We don't have a fireplace in our house, so therefore, we do not have a mantel. I miss having a mantel to decorate with the seasons and holidays. After seeing all the amazing mantels on Pinterest, I decided it was time to remedy my mantel-less situation.

Since adding a fireplace to our house was not going to happen, I decided to make a "mantel". I had seen Shelley's kitchen shelves tutorial here,

and knew that I could make some too. So, off to Home Depot I went. I decided I wanted my shelves 3 feet and 4 feet long, so I purchased an 8 foot long 1x6 ($7.22) and had the guy at Home Depot cut it for me. I had found some brackets that I really wanted to use, but they were $6.85 each, and I needed four. I found some cheaper brackets that were not as pretty but would do the job for $1.98. Problem was, there was only two of them. Here's where it pays to chat up the associates at your favorite stores. I told the guy cutting my board that I had found two brackets but needed four and that there were other brackets I loved but were too expensive. What did he do? He gave the prettier, more expensive brackets to me for the cost of the cheap ones! SCORE! I got four, really pretty, more substantial wooden brackets for $7.92! He told me it was their fault they didn't have what I needed, and you should always ask for an upgrade when that happens. I think I thanked him about 100 times.

Below is one of the beautiful brackets!


Ben and I actually worked together on this project. Those that know us, know we do not work well together. We almost killed each other once on a canoeing trip because we both are crazy stubborn, and I like to be in charge. Big surprise. We will never go canoeing again.
Ben helped me cut the trim for the shelves with the miter box (still don't have that 12 inch miter saw with a laser). I actually only got frustrated once during the whole process! After all that cutting, we both decided that the shelves looked better without the trim. If I change my mind, I've got it already cut and ready to go...

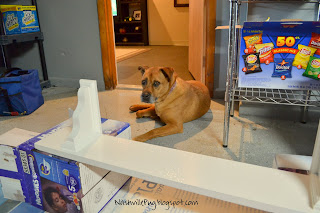
Here is my priming station all set up under the carport one night. Yes, those are diaper boxes. I used spray primer for the first coat, and then gave the wood a good, fine sanding. But for the actual paint I used, wait for it........regular paint and a real paint brush and roller! Shocker, I know.


I used Glidden Antique White in semi gloss because this color will be showing up on my kitchen cabinets in the very near future. I added some Floetrol to my paint after reading Centsational Girl's praises of the stuff. It's supposed to minimize brush strokes in latex paint, and let me tell ya, it does! I am now in love with Floetrol. There is not a brush stroke to be found on my shelves. It makes me want to paint my kitchen cabinets yesterday.


Here's my painting set up on Sunday. I had to position myself in the garage so I could see the "man room" TV since the Titans were playing.


Hoover was my painting companion this time. Had to give the mutt some blog time too.

And here are my new shelves, all ready for fall decor, hung in the dining area of our kitchen!


Now I have not one, but TWO "mantels"! I am in love with my new shelves. In total, they cost just $16 to make!


I added some pumpkins and gourds that came from Michael's and Wal-Mart. The little urns had silk flowers in them and were on clearance. I knew I could pluck the flowers right out and use the urns for something else.

The wreath was a $2.50 Michael's find. The "M" I already had.


Love this little wire basket I found at PD's in Franklin.


The tray was a hostess gift and has leaves and acorns on it. I found a great place to display my WUSLU bottles and caddy!


One last look...I love it!


I'll be linking up  to the Fall Mantels party at The Lettered Cottage!
The Lettered Cottage

And here as well:
Visit thecsiproject.com  Todays Creative Blog Domestically Speaking   Weekend Bloggy Reading The DIY Show Off Remodelaholic    The DIY Show Off  mY Uncommon Slice of Suburbia 

Posted by Picasa