We don't have a fireplace in our house, so therefore, we do not have a mantel. I miss having a mantel to decorate with the seasons and holidays. After seeing all the amazing mantels on
Pinterest, I decided it was time to remedy my mantel-less situation.
Since adding a fireplace to our house was not going to happen, I decided to make a "mantel". I had seen Shelley's kitchen shelves tutorial
here,

and knew that I could make some too. So, off to Home Depot I went. I decided I wanted my shelves 3 feet and 4 feet long, so I purchased an 8 foot long 1x6 ($7.22) and had the guy at Home Depot cut it for me. I had found some brackets that I really wanted to use, but they were $6.85 each, and I needed four. I found some cheaper brackets that were not as pretty but would do the job for $1.98. Problem was, there was only two of them. Here's where it pays to chat up the associates at your favorite stores. I told the guy cutting my board that I had found two brackets but needed four and that there were other brackets I loved but were too expensive. What did he do? He gave the prettier, more expensive brackets to me for the cost of the cheap ones! SCORE! I got four, really pretty, more substantial wooden brackets for $7.92! He told me it was their fault they didn't have what I needed, and you should always ask for an upgrade when that happens. I think I thanked him about 100 times.
Below is one of the beautiful brackets!

Ben and I actually worked together on this project. Those that know us, know we do not work well together. We almost killed each other once on a canoeing trip because we both are crazy stubborn, and I like to be in charge. Big surprise. We will never go canoeing again.
Ben helped me cut the trim for the shelves with the miter box (still don't have that
12 inch miter saw with a laser). I actually only got frustrated once during the whole process! After all that cutting, we both decided that the shelves looked better without the trim. If I change my mind, I've got it already cut and ready to go...
Here is my priming station all set up under the carport one night. Yes, those are diaper boxes. I used spray primer for the first coat, and then gave the wood a good, fine sanding. But for the actual paint I used, wait for it........regular paint and a real paint brush and roller! Shocker, I know.

I used Glidden Antique White in semi gloss because this color will be showing up on my kitchen cabinets in the very near future. I added some Floetrol to my paint after reading
Centsational Girl's praises of the stuff. It's supposed to minimize brush strokes in latex paint, and let me tell ya, it does! I am now in love with Floetrol. There is not a brush stroke to be found on my shelves. It makes me want to paint my kitchen cabinets yesterday.

Here's my painting set up on Sunday. I had to position myself in the garage so I could see the "man room" TV since the Titans were playing.

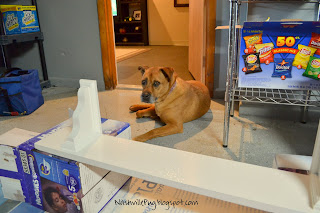
Hoover was my painting companion this time. Had to give the mutt some blog time too.
And here are my new shelves, all ready for fall decor, hung in the dining area of our kitchen!

Now I have not one, but TWO "mantels"! I am in love with my new shelves. In total, they cost just $16 to make!

I added some pumpkins and gourds that came from Michael's and Wal-Mart. The little urns had silk flowers in them and were on clearance. I knew I could pluck the flowers right out and use the urns for something else.
The wreath was a $2.50 Michael's find. The "M" I already had.

Love this little wire basket I found at PD's in Franklin.


The tray was a hostess gift and has leaves and acorns on it. I found a great place to display my
WUSLU bottles and caddy!

One last look...I love it!

I'll be linking up to the Fall Mantels party at
The Lettered Cottage!

And here as well:


