Showing posts with label furniture. Show all posts

Monday, September 19, 2011

I Love Spray Paint (and Naptime Too)!


One afternoon last week while E was napping, I decided it was time to paint the old, rickety side table in the den. To say I dislike the table would be giving it a compliment! A lot of things need changing in our den (some took place this weekend!), and this one was a quick and easy fix that involved my favorite tool...spray paint!

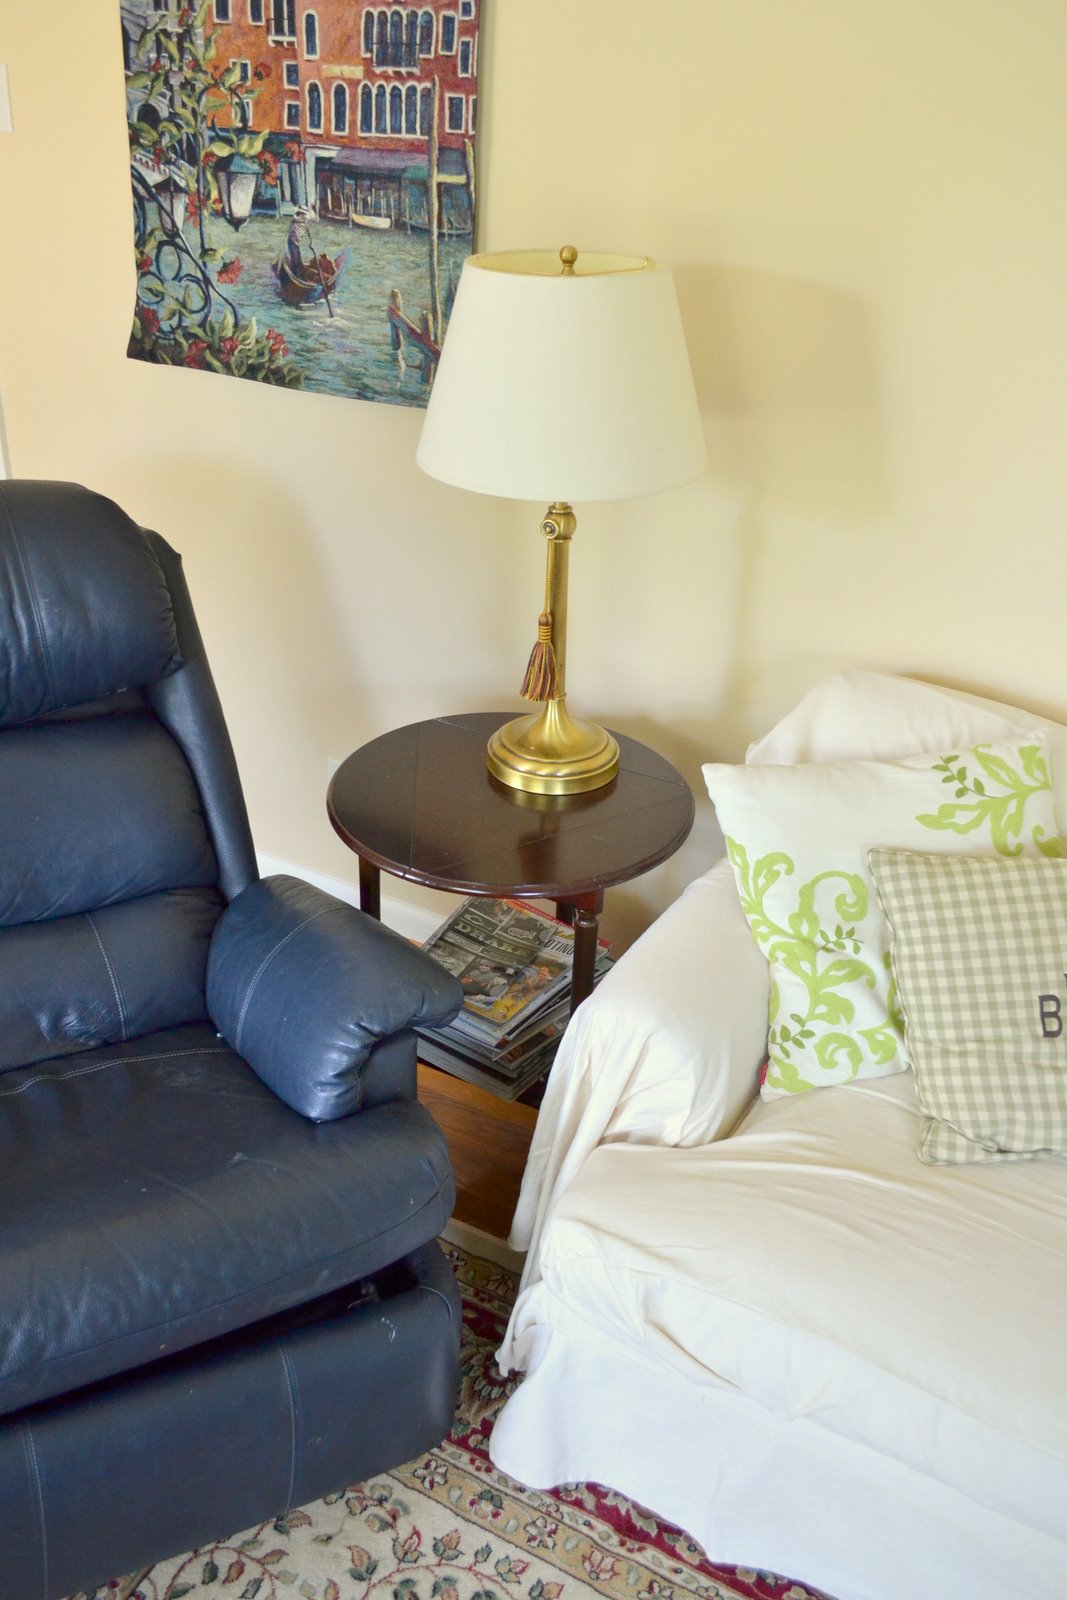
A look at the table before. That ugly recliner has got to go!

A bigger view. Yep, I made that sunburst mirror this summer out of wood shims. A $40 project that I love!
Sidenote: That tapestry was made from a photo my amazing Granddaddy took on one of his many travels.

I sanded the table down a bit since it had such a glossy coating on it.

These were my partners in crime. The color for the table is "strawflower".

Every girl needs this little accessory!

Primed and ready to paint! The leaves of the table come down if you twist the top.

All ready to go back upstairs! I did a little distressing after I took this picture. The perfect yellow paint job was bugging me a bit. It needed to be messed up!

A little distressing did the trick!


I think it looks so much better! Now, what to do about that lamp and chair!
Update: The lamp has been made over! Pics to come soon!


Linking to:
Metamorphosis Monday

Thrifty Decor Chick
Home Stories A to Z
Tatertots and Jello
Domestically Speaking


Weekend Bloggy Reading


36th Avenue


Monday, September 5, 2011

PB Project Table Knockoff

Pottery Barn is going to hate me...
This is the desk I wanted for my craft/work/laundry room. "The Bedford Project Table" It's from Pottery Barn, and it costs $1,099 (plus $120 shipping). Nope, not in the budget. Not even close.


It took me a quick second to realize that I had seen those cubes before in the form of the below Closetmaid Cubeicals, found at Target for $40, on sale. I could use two of those for either end, and then all it needed was a tabletop, and I would have my craft table! So, I sent Ben to Home Depot for some wood. (If you know me and my projects, sending Ben to get some of my supplies is HUGE!) I decided I wanted the table to match the PB specifications of 55 inches long x 37 inches high x 38 inches deep. The cubes are 36 inches high and 36 inches deep. He came home with 7, 2x6 boards that they cut at Home Depot to 55 inches long. The boards are actually 5.5 inches wide, but for some reason they are called 2x6. Probably to confuse people like me who would have trusted that they were 6 inches wide like it said and not bothered to actually measure.


I knew I wanted to stain the wood instead of painting it white like the PB version. I wanted the top to contrast with the white cubes. So, I picked up a can of wood conditioner and a can of stain & poly in one ($24 total). The stain color is "Mission Oak Satin". The stain plus poly is different from regular stain in that you don't wipe it off in between coats. You brush on a thin coat, let it sit for 6 hours and then apply another coat if needed. I only needed one coat, and it looked great!


Don't let the smile fool you; he HATES projects!


My staining setup in the garage. Who needs a saw horse when you have loads of paint cans?


This is my craft area before:

The desk is long, but not tall or wide enough to do my sewing projects easily. I envisioned something that would let me stand to cut fabric with lots of storage.

And after!!! I am in love with my new table! To assemble, we screwed the boards to the cubes from underneath the top shelf of the cube. That way, when we move, we can just unscrew and go. I think we're going to add some braces in between the boards underneath as well to give it more stability.


Look at that wood!


Can't wait to start using this guy at my new table!


I think it looks quite similar to the PB version! I love having all the cubes to store my craft & sewing supplies, stationery, etc. The PB version has a back on the inner sides of the cubes, but I think I'm going to leave mine open since I can grab things from either side. Now I just need to make a trip to the consignment store, also known as my parents' basement, and grab a bar stool!


Project break down:
White cubes from Target: $80
Wood from Home Depot: $20
Conditioner & Stain: $24
Project Total: $124
PB Project Table: $1,099 + $120 shipping
Savings: over $1,000!!
I made this table for the price of shipping!

What have you knocked off lately?


Friday, September 2, 2011

Childhood Table & Chairs Redo

Last November, I decided to clean out my parent's house to have a garage sale. It was a huge undertaking, but I came across some great stuff! Up in the attic, were many of our childhood toys. Some had gotten so hot that they had melted together over the 20+ years up there! I found our old riding toys, an old wooden cradle, a wooden Noah's Ark, wooden rocking chairs, our kid sized table and chairs and much more! I immediately ran downstairs and asked mom if I could take the table and chairs home for E to use. She decided since I had taken the initiative to clean out the house, that they could be mine (I do have twin brothers and all, but I'm the self-proclaimed favorite). The boys had no idea what was up in that attic and they certainly weren't going to climb up there and clean it out. I was super duper excited! There may or may not have been grumbling, complaining, and bitterness that I had the table and chairs, but guess who climbed up in the hot attic and drug them down?!

The table and chairs sat in our den for a few months just the way they were (dark, stained wood). We have a lot of dark wood in our house, so I decided to liven up the set a bit (I asked permission AFTER I painted, since I knew I would meet some resistance). I wanted E to really enjoy the table and chairs like I did. I used spray paint for the chairs and table base, and then applied chalkboard paint to the table top so E could draw on it. I LOVE how it turned out, and E did too! Since I knew the set would take a beating, I went ahead and distressed it a bit so it would look purposeful. I used Valspar spray paint from Lowes. The colors I chose were Berry (red), Mediterranean (blue), and Hubbell House (yellow). Spray paint is so easy to use as long as you take your time and do several thin coats so you don't get drips.


Love how these colors look together!


Yes, I am well aware that zebras, hippos, and elephants to not belong on a farm! Gotta love the Target dollar section for some plastic animals!


Do you all love spray paint as much as I do?!

Linking to:
Perfectly Imperfect Linky Party
Home Stories A to Z
Tatertots and Jello
Serenity Now 
Addicted 2 Decorating
Just A Girl
Ta-Da Tuesday Link Party
Power of Paint Party

Posted by Picasa