We don't have a fireplace in our house, so therefore, we do not have a mantel. I miss having a mantel to decorate with the seasons and holidays. After seeing all the amazing mantels on Pinterest, I decided it was time to remedy my mantel-less situation.
Since adding a fireplace to our house was not going to happen, I decided to make a "mantel". I had seen Shelley's kitchen shelves tutorial here,

and knew that I could make some too. So, off to Home Depot I went. I decided I wanted my shelves 3 feet and 4 feet long, so I purchased an 8 foot long 1x6 ($7.22) and had the guy at Home Depot cut it for me. I had found some brackets that I really wanted to use, but they were $6.85 each, and I needed four. I found some cheaper brackets that were not as pretty but would do the job for $1.98. Problem was, there was only two of them. Here's where it pays to chat up the associates at your favorite stores. I told the guy cutting my board that I had found two brackets but needed four and that there were other brackets I loved but were too expensive. What did he do? He gave the prettier, more expensive brackets to me for the cost of the cheap ones! SCORE! I got four, really pretty, more substantial wooden brackets for $7.92! He told me it was their fault they didn't have what I needed, and you should always ask for an upgrade when that happens. I think I thanked him about 100 times.
Below is one of the beautiful brackets!

Ben and I actually worked together on this project. Those that know us, know we do not work well together. We almost killed each other once on a canoeing trip because we both are crazy stubborn, and I like to be in charge. Big surprise. We will never go canoeing again.
Ben helped me cut the trim for the shelves with the miter box (still don't have that 12 inch miter saw with a laser). I actually only got frustrated once during the whole process! After all that cutting, we both decided that the shelves looked better without the trim. If I change my mind, I've got it already cut and ready to go...
Here is my priming station all set up under the carport one night. Yes, those are diaper boxes. I used spray primer for the first coat, and then gave the wood a good, fine sanding. But for the actual paint I used, wait for it........regular paint and a real paint brush and roller! Shocker, I know.

I used Glidden Antique White in semi gloss because this color will be showing up on my kitchen cabinets in the very near future. I added some Floetrol to my paint after reading Centsational Girl's praises of the stuff. It's supposed to minimize brush strokes in latex paint, and let me tell ya, it does! I am now in love with Floetrol. There is not a brush stroke to be found on my shelves. It makes me want to paint my kitchen cabinets yesterday.

Here's my painting set up on Sunday. I had to position myself in the garage so I could see the "man room" TV since the Titans were playing.

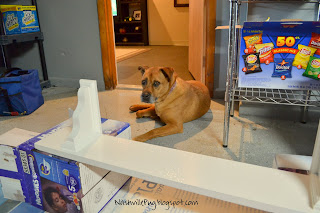
Hoover was my painting companion this time. Had to give the mutt some blog time too.
And here are my new shelves, all ready for fall decor, hung in the dining area of our kitchen!

Now I have not one, but TWO "mantels"! I am in love with my new shelves. In total, they cost just $16 to make!

I added some pumpkins and gourds that came from Michael's and Wal-Mart. The little urns had silk flowers in them and were on clearance. I knew I could pluck the flowers right out and use the urns for something else.
The wreath was a $2.50 Michael's find. The "M" I already had.

Love this little wire basket I found at PD's in Franklin.


The tray was a hostess gift and has leaves and acorns on it. I found a great place to display my WUSLU bottles and caddy!

One last look...I love it!

I'll be linking up to the Fall Mantels party at The Lettered Cottage!

And here as well:












The shelves turned out super cute. I'm dying to know -- what is PD's? (I'm in Franklin!)
ReplyDeletelooks great! i love that you took your inspiration and made those shelves. i don't have a mantel either, i just decorate around my tv.
ReplyDeleteI found your blog through the fall mantle link up party. So cute!! I also want to do those pumpkin topiaries, I love how yours turned out!
ReplyDeleteI'm also in Nashville, how fun!
Love it! I'm usually a spray-painter, too, but I'm so tired of waiting for a cool day here in Texas (100 tomorrow!!) and dying to finish a project, I'm tempted to try to latex with floetrol, too, so I can paint inside. How much did you use for your project? And thanks for the beautiful and helpful post!
ReplyDeleteI copied the beloved House of Smiths shelves too! Too good looking not to, right? I love how you decorated yours for fall! Thank you so much for stopping by and commenting on my fall wreath!
ReplyDeleteJen
Love the shelves and you can't beat the price !!! Great job.
ReplyDeleteSo cute!! Those shelves look a lot like the Ballard Cafe shelves that I love...so cool that you and yours hubs made them. :)
ReplyDeleteGlad you found something at PD's. Katie did not get the sofa, just not sold on it. Even at PD's, it's not a bargin if you don't love it. I love what you did with the shelfs and Fall accessories. The acorn platter looks sort of familiar! Glad you're using it. Here is the link to the store "Nadeau" that I told you about. They got a new shipment today. http://s896.photobucket.com/albums/ac169/nadeaunashville/ Good seeing you the other day.
ReplyDeleteGreat Job! Love the cute shelves and the fall decor!
ReplyDeleteFantastic! I"m a Nashville gal, too (found you through the link up party), so I giggled when I saw the PD's purchase! I love your display! I'm inspired!
ReplyDeleteI love it. Looks great especially for $16! I would love for you to link up with us http://www.thesasselife.com/2011/09/link-party-5.html. Hope to see you there!
ReplyDeleteKim
www.thesasselife.com
your new shelf looks great, especially with all your fall decor!
ReplyDeleteColey
www.whatyoumakeit-coley.blogspot.com
These turned out great! And I love the way you styled them- perfect for fall. I'd love if you'd check out the giveaway I'm having for a Dremel Saw Max- I think it would come in handy for your next building project! ;)
ReplyDeleteI'm floored by your Home Depot story! What a great thing to keep in mind.
ReplyDeleteWe don't have a mantel either, so I love love love this idea.
(PS I found your blog via Addicted 2 Decorating's link party!)
Great solution!
ReplyDeleteI love the little basket, it's so sweet :)
Love what you did. So many great details. Very inviting!
ReplyDelete~ Meredith From A Mother Seeking Come find me on my blog, A Mother Seeking...
The shelves look great and i love the way you decorated them!!
ReplyDeleteHugs,
Debbie
Love them! The shelves are awesome and look great. It's a great DIY since premade shelves cost a redic amount
ReplyDeleteYou did a great job and styled your shelves so wonderfully! Thanks for the heads up on the Floetrol. I missed that post at Centsational Girl. Stopping by from diy Showoff.
ReplyDeleteCongratulations on our New mantle. Your decorations looks great!
ReplyDeleteI love this idea and you decorated beautifully! Thank you for linking up and sharing it at Project Queen.
ReplyDeleteI love your "mantels"! I am in the same situation and am putting some shelves up in my kitchen this week. I love the little urns. It all looks great!!
ReplyDeleteAmazing!!! It all looks great!! I am visiting from My Uncommon Slice of Suburbia and I am a new follower!
ReplyDeleteHope you are having a good week!
Michelle
www.delicateconstruction.blogspot.com
Thanks so much for telling us how you did that. I love little shelves like that. Pretty sure I "need" them in every room.:)
ReplyDeleteThose look absolutely beautiful! You did such a great job coming up with a mantel-less solution and everything is gorgeous! :-) Thank you so much for sharing this with us last weekend at Inspiration Friday and we hope to see you again this week!
ReplyDeleteVanessa
More than beautiful! You are one smart and I must say lucky lady for getting those cheap brackets ;) Thanks for sharing!
ReplyDelete